Importing and scanning sheet music
Bring in a MusicXML or MIDI file, or turn a photo or PDF into editable notation with on-device optical music recognition (OMR).
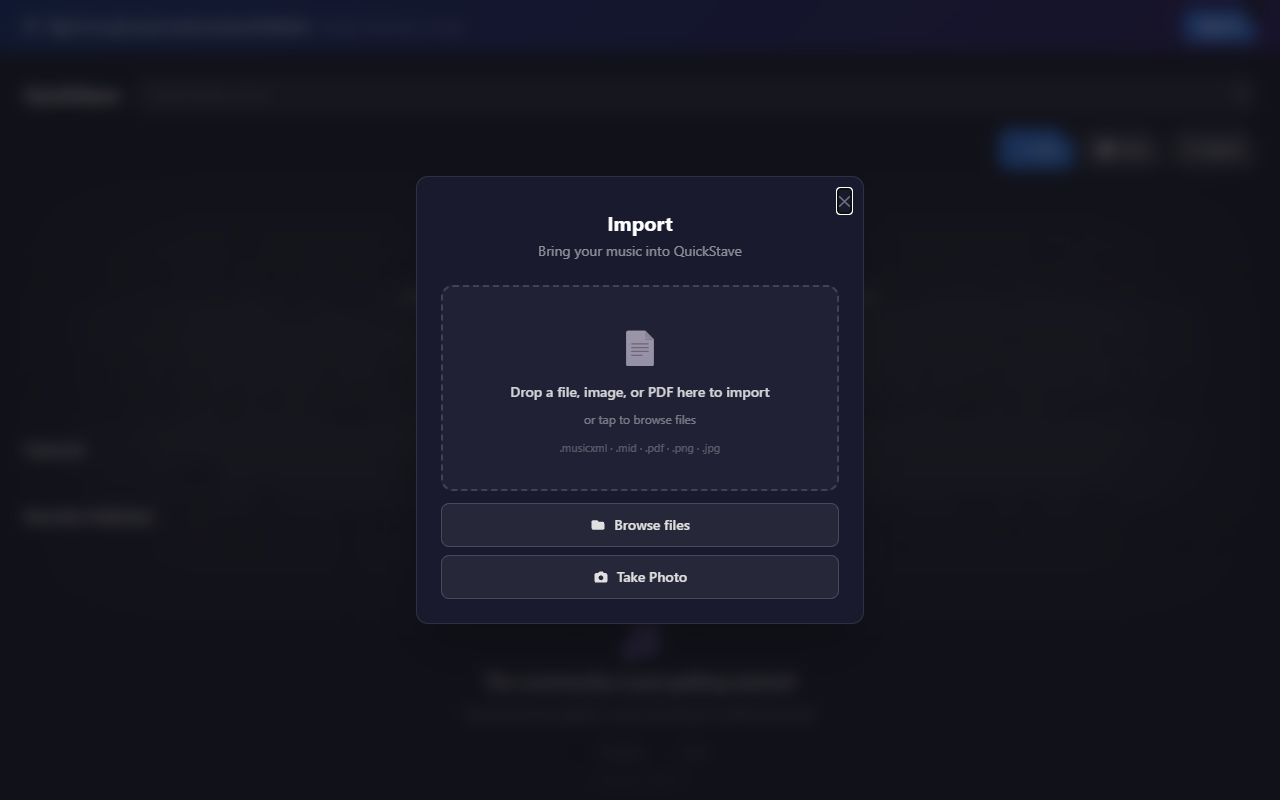
Two buttons on the Projects screen — Import (I) and Scan
(P) — open the same dialog; either one accepts every file type below,
they just lead with a different starting view. Dropping a file anywhere
on the Projects screen works the same way, without pressing either
button first.
Import always creates a new score — it never replaces or merges into one you already have open.
MusicXML
A .musicxml, .xml, or .mxl file parses immediately. Any warnings
from the conversion are listed (duplicates collapsed with a count), then
Open Score loads it.
Some programs write a turn’s or mordent’s accidental as a text sharp, flat, or natural over the symbol. Imported, it becomes the ornament’s own accidental: it sits above or below the symbol and plays.
MIDI
A .mid/.midi file opens a live-preview dialog instead of importing
straight away: a quantization resolution (down to a 32nd note), optional
dotted notes and triplet detection, a minimum note duration, and how
tracks map to instruments (kept as separate parts, merged onto one grand
staff, or split by pitch at an adjustable point). The notation preview on
the right updates as you change any of these, so you can see the result
before committing to it.
Notes are spelled to the key signature, except a note outside the key a semitone from the single note before it in its voice, which takes a sharp going up and a flat going down.
Photo or PDF (scanning)
A photo or PDF page runs through on-device optical music recognition (OMR) — the recognition model runs in your browser, so a page never leaves your device. Progress is shown as real detection stages over the source image (not a generic spinner), and a PDF’s pages are rasterized and scanned automatically.
Scanning a photo is a multi-page flow: after one page finishes, add another (camera or file) before finishing, and the measure count grows as each page is added. Either way, you land on an editable preview of the assembled score before accepting it — expect to need some correction afterward, the same as any OMR system.
The original’s lines are kept
A scanned score keeps the printed page’s layout: each line of music in the original starts a new line in the score, and each new page starts a new page. The same bars sit on each line as in the original, so you can proofread the scan against the page line by line.
To fit each of those lines across the page, a scan may get a smaller
staff size, down to 4.8 mm, never a larger one. It’s the score’s Staff
Size in Score Properties (Ctrl+P), where you can change it. If a
line is too dense to fit even at 4.8 mm, the scan’s preview says how many
lines were, and each of those is split over two or more lines.
While you edit, lines follow the width of your window rather than the page: each of the original’s lines still starts a new one, but on a narrow screen a long line can wrap.
Removing the original’s line breaks
The kept lines are ordinary line breaks, the same as the ones Split
(F8 S) adds. To let QuickStave lay out a passage, or the whole score,
itself:
- Select the bars —
Ctrl+Aselects the whole score. - Press
F8 S. With two or more bars selected, it opens Remove breaks, which counts the line and page breaks on the selected bars. - Choose Remove.
The first selected bar’s break goes too, as it does when you remove that bar’s break on its own; the line after the selection still starts where it did. One undo brings every removed break back.
A few things to know
- Accepted files: MusicXML/MXL, MIDI, PDF, and images (PNG/JPEG/WebP/BMP/ TIFF) — up to 50 MB.
- A “Take Photo” option appears automatically if your device has a camera.
- If a file isn’t recognized as one of the above, you’ll see exactly which extension failed rather than a generic error.
Tips
- Bringing a score back out? See Exporting your score.
- OMR does best with a clean, well-lit, flat page — a phone photo works, but a straight-on shot beats an angled one.